
First of all I must thank Chad Lamothe for totally revamping Aunty’s website. Chad first critiqued the original honoluluaunty.com on Fiverr.com and gave it a whipping, deservedly so. Aunty then hired him for a very reasonable fee to fix it, and he did! 2nd of all, mahalo to you, Aunty’s readers!!! Now Aunty feels like a new butterfly that has emerged out of a cocoon.

One day, number 1 son sat me down in front of the computer and set it up for me with me being an active participant and forced to do this and that by him. HonoluluAunty.com was born.
Google search “How to Make a Website in easy steps.” There are several options, some are videos, some are text. Or, you can walk along with me as I stumbled through the steps to build this website.
I picked the website name through GoDaddy.com. I chose 2 of them at first, HonoluluAunty.com and HonoluluAunty.info, and then added HonoluluAuntie.com. Here is a link to GoDaddy’s site. Don’t go too crazy and buy too many names like I did at first. [Aunty gets affiliate income if you go through the links here, so much mahalo in advance!]
[note: it sometimes takes 48 hours before changes and reversals of changes on your website hosting takes place. Sometimes it is very sporadic and the right page appears and then it is the GoDaddy home page with a genetically altered female in a skimpy tank top. Don’t panic, it will all be back to normal. Lesson learned – don’t change or mess around with too many options on GoDaddy once you have your website up and running for a while.]
On the GoDaddy site, you will first do a search for your desired name, and if it is available, you will know instantly. You can choose to have additional names for additional costs. Then, chose the length of time from 1-10 years (you will be charged for each year).
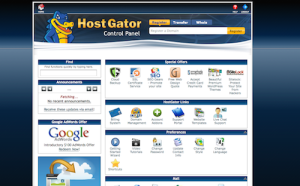
I started a hosting account with Hostgator for an annual fee. [I really don’t know why my favorite son set it up this way, but I yield to his expertise.] That being done, I am now an affiliate with Hostgator, so if you click on the Hostgator banner on this page or other pages and sign up for an account, I get a referral fee!
Don’t sign up unless you are really going to have a website. If you do decide to sign up, search for “hostgator coupon code” on google so you can enter that code before you checkout so that you can save some $$.
[You can also buy your domain names (like PupuleWhatever.com) on either GoDaddy or Hostgator and ALSO have them host your site. This may or may not be a better way to do things.]
So, now you have your domain name, and have signed up for hosting on either GoDaddy or Hostgater. You will “tell” your hosting server (in Aunty’s case, Hostgator) your domain name so it registers it and “hosts” it. This is where I think it is simpler to have the domain name and hosting on the same company, BUT, like I say, I yield to my son’s expertise and thus have GoDaddy for my domain name reservations, and HostGator as my host server. It means that I pay 2 different companies.
In Aunty’s case (and yours if you use GoDaddy for the name and Hostgator for the hosting), we must now change our Nameserver over from GoDaddy to Hostgator.
* Important note: Hostgator will send you an email with the subject heading: Hostgator.com:: Your Account Info. This is a VERY important email, so make sure you note it and keep it. This will have login info – you will need this, as well as your control panel address, user name and password that THEY generated. You will change this password to your own once you sign in.
To do this, go to your Hostgator cpanel (your website/c-panel) and make note of your 2 “nameservers” under your account info (scroll all the way down to the “account information” box. Then, open up your GoDaddy account (Go to GoDaddy.com and sign in) and click on “My Account” at the top. Click on the “+” next to “Domains” – it should be the first on the list of “products” (default starting page).
Find your website domain name – if you have several, that name might be on subsequent pages but if you only chose 1 name, it should be in the viewer. Click “launch” and it will take you to a page full of information about your website. Locate the section that says “Nameservers”. Click on “Set Nameservers”.
This will open a separate box with options. Choose “I have specific nameservers for my domains”. Enter the 2 nameservers that you noted under your Hostgator cpanel account page, replacing the ones that GoDaddy has auto-filled and click “OK”.
*Note: This is easy for some people, but it wasn’t easy for Aunty
 The support at Hostgator is excellent. If you are not too computer savvy, let them know. And be thankful even if you KNOW they have to put up with unsavvy computer people all day long. Print out the email from Hostgator when you first start with the account info. Start by logging into your billing site following the email’s instructions (recently it was using your email address and the complex password they provide. Copy and paste – makes it easier.
There, you can add stuff, change password, etc. Aunty suggests that you change the password or else you will have to copy and paste or remember their complex one all the time.
After you finish with that, log into your control panel with the website address provided in your email. Just click on it and your browser will open a window. Enter your user name (they will show it in the email) and your password – try the other complex one the email provides, and if that doesn’t work, put in the password that you changed in your billing site. Don’t get too frustrated. You can do it. If not this, then that. If all else fails, call Hostgator for help. 866-964-2877.
After you log in to your control panel, their “Getting Started” box with tutorials will pop up. Most of these tutorials are for advanced websiters – but “Change Password” is a good one because you want a password that you can remember instead of the complex one that was automatically generated.
The HOME button will take you to the opening page. This page has everything you need, and a lot of what you don’t need. Be careful about clicking on boxes that pop up asking you to get something. Usually it is some web tool that you can buy. You can always do so later, so just click the “x” to close those pop ups.
*Note – it takes time for changes to take place, so if nothing is happening, just wait a little while, and your website will be up and running.
[I recently had a problem with this website linking to something other than HonoluluAunty – which was terribly frustrating because it would do it intermittently and of course NEVER when a techie was around. I went from customer phone support at GoDaddy.com to customer phone support at Hostgator.com. Both were excellent, though the solution took a little while to solve. Thank you so much to Alan W. at Hostgator who found one little transposition of numbers in my name server on GoDaddy through a tracing that I was taught to perform and emailed to support for analysis. Fantastic. All good now!] [update 2 years later: Aunty forgot to pay her renewal fees and the account was inaccessible. So, a call to Hostgator fixed it immediately, as well as fixing other issues too! Much mahalo to Matt over there. Those guys are so good and smart!]
Next comes WordPress – a free service with so many wonderful options. I first heard about WordPress because of a website I frequented and loved, http://margaretandhelen.wordpress.com/ These 2 80 year old ladies are a hoot. Best friends forever, and it started off with both of them acting like giggly youngsters with a new toy – their own blog/website. Warning: it is very political and could be offensive if you are offended. If you use WordPress to host (as Margaret and Helen do), your URL address (your website name) will reflect that with “wordpress.com” at the end of your name. [margaret and helen have upgraded to a dot com now.] It is okay to do it that way, but I chose to go the route of buying my own domain name from GoDaddy and having HostGator host, because I feel having a “.com” at the end of my website name is easier to remember and looks more professional. [**note: you can also sign up at WordPress.com and choose to have your domain name with a dot com URL address as an option, and WordPress with charge you $18 per year for that service. This sounds like the easy route, but this was not what Aunty had already been set up for. If this works well for you, please comment below, mahalo!]
To set up and use WordPress for its free themes and easy to use platform, go to your Hostgator cpanel (you should have received your log in and instructions when you purchased hosting from Hostgator. Scroll down that cpanel page until you see the “Software/Services” section (almost at the bottom) and click on the “QuickInstall” icon (looks like a clock with a wrap around arrow).
This will pull up a page of a list of options on the left. Under “Blog Software”, choose “WordPress”, which has been described as “free and priceless”. Click “continue”, then “save”.
Install your domain name (should already be in the drop down menu as default), enter your email address, the title of your blog name (i.e. Honolulu Aunty and not necessarily your website name), admin user name (what you will log in with), first name, and last name (can be whatever you want, just be sure to note it). Click “submit” and WordPress will run it through the system and give you a “Congratulations” with your administrator sign in page (your website/wp-admin), user (log in) name, and a generated password which you will change after signing in the first time. (copy down this password or keep the welcome email since you will need this to log in.)
***Please be sure to write down you user names/passwords/accounts for future reference!*********
Be patient after this step. It sometimes takes 1-48 hours before the website/hosts/changes/etc. are accessible even though it seems like everything should be in place. Take a break, watch some tv, read a book, play a game, do some work. By the time you have done that, your site will be up and published on WordPress.
When some time has passed,log onto your website by entering your website URL (your website.com name) with the forward slash (/) “wp-admin” = Yourwebsite.com/wp-admin. Enter your admin user name (that you had chosen earlier), enter your password (the assigned one for now). This will take you to your website admin page, Just another WordPress.site, and “Hello world!” will welcome you to starting off.
This is your “Welcome to WordPress!” page, and you get started by selecting “Customize Your Site” or “change your theme entirely”. If you choose “Customize Your Site”, you will have the default latest WordPress theme – which is pretty okay, imo. It is also the easiest, imo.
However, you may decide you want a different layout and so you can choose “change your theme entirely” and if you know what theme you want (by name) or click on “newest”, “updated”, “featured”, you will see other themes to choose from. Some are for the more techno savvy. Keep in mind that you can change your theme later on (the way Aunty did) and there are excellent sources (such as Chad of Goodfella Marketing) who are able to do this for you for a fee.
After you have chosen your WordPress Theme, Activate it, then choose “Customize” to take you to a page in which you can change or add your site title & tagline, colors, header image, background image, and static front page (either your latest posts or home page).
Do not worry about making mistakes at this stage. No one is looking at your site unless you tell them to. Also, whatever you do is not set in stone and can be changed later.
Close this window after you have made changes and this will take you to your administrative page with Dashboard and the many elements that you now have in your control. The first action step Aunty took was doing an “About Aunty” page. This was done as a “Page”. Pages are more for permanent, non changeable, non timely, such as “About” or “Contact” pages.
Wonderful son showed me how to add pages, how to link, how to add pictures, etc. after I chose to “Customize Your Site” and activate with the default Twenty Ten WordPress Theme. At first I used a standard banner from WordPress – a beautiful peaceful golden photo of a tree lined path in a pasture. Trouble was it wasn’t befitting Honolulu or Aunty so I found an old picture I had taken from the airplane of the Honolulu coastline, cropped, edited, and inserted as my new banner after several tries. After about 3 years, Aunty hired several people at Fiverr.com to develop Aunty’s headline banner. These were all done for $5! Not all of them were good, and Aunty is currently using the present banner, subject to her whim.
This part of the website development is really a trial and error, burn and trash kind of stage. Don’t worry about it too much – just do it! Editing and constant changing are normal, and you are in control. When you get frustrated, just save as a draft and come back to it later. It will all be fine.
Apple Store people helped me during my One-on-One sessions after that. I learned how to embed videos and check on stats. I added some tags (which I still don’t understand), but I am learning. Once you learn how to do something in the WordPress admin, you can pretty much do the same in whatever theme you change to later. Chad has been instrumental in giving me not only a new and fresh look, but also in strategies in affiliate marketing, layout, and flow.
I have changed from the opening page being my “Welcome to Aunty” page, to “About Aunty”, to “Posts and News”, and back to “Welcome to Aunty” as my home page very easily with the WordPress administration options. It takes time, but when you need to learn how to do something, you will. On the WordPress administration bar (looks like a bunch of symbols on a keyboard) you can do bold, italics, cross out, indents, links, break links, break a long commentary, embed pictures, video, change font color, etc, etc, etc. Their help page is good – just takes some getting used to. Awesome free software, can’t say enough about how great it is for anyone to use and get the results they want.
**AmyLynnAndrews.com is a fantastic source of information from a youngster about how to make, maintain, update and improve your website. I subscribe to her site and love the way she teaches so that even I can get it. She takes you step by step with tutorials and videos so you can build your own website (with a different host server).**
Each page that you write becomes like a tab on the menu bar (Aunty’s menu bar has: About Aunty, Products, Website, Contact.) This needs to be controlled by deciding which pages are “parent” pages and other pages that relate to that page become sub-pages (such as “About Aunty” has a sub-page called “Intro”). [Aunty had too many pages with sub pages and sub sub pages that were scrolling menus of confusion prior to Chad Lamothe’s fix. Now, Aunty writes posts that are categorized which makes for easier navigating and a cleaner look.]
Write, write, and write some more. You can always save and edit later. The squeeze portion (where people put their email address in to receive posts or news in their email) is a widget from Google and is free thing. Somehow I did put it up but I really forget how I did it. I think I used the BloggingWithAmy.com tutorial for help. [There has been some talk that Google will be dropping feedburner, but Aunty will change when and if it happens.]
This website is just terrific for me. It is a release of ideas, information, and note taking all in one place. By default, I have become a webmaster. It is like giving birth without as much pain.
I hope you dive in and make your own website. It’s easier than you think, and doesn’t cost thousands of dollars the way it used to. If you do use this page to start your own blog/website, please let Aunty know so she can check it out!
If you want to contact Chad, my hero web re-designer, his email address is chad.lamothe@gmail.com. Tell him Aunty sent you. He can make internet magic for a very reasonable fee, or fix the whole package if you have been blogging for awhile.
Dear Aunty, Thank you for the Informative post. You’re so neat. I have to read several times to fully understand but grateful for the tips and links.
Mahalo Nippon Nin!
There is SO much to learn about blogging/websites. Overwhelming, so I plod along and find help. I take some solace from the fact that a lot of the computer experts at the Apple store admit to not knowing about websites, too.
I absolutely love your blog – your recipes and photos make my mouth water! Okay if I link to yours when I post a recipe?
Aunty