Hawaiian Electric’s Mochi Rice Stuffing

lunch-spreadEvery Thanksgiving, Aunty makes this mochi rice stuffing for friends and family.  The very first year, we used it to stuff the turkey that Uncle and Cousin Mike were in charge of – using a large hibachi grill with dome cover.  Because the turkey was stuffed, it took way longer to cook and the 2 “boys” came in sunburned, quite drunk with too many beers, and the stuffing oozing out and charred.

It was really really delicious, though, but the following years, we stopped stuffing it into turkeys in order to save on cooking and drinking time.

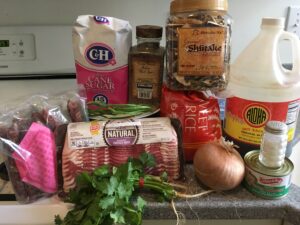
We use Mow Lee & Co.  lup cheong from a hole in the wall place at 774 Commercial Street in San Francisco .  Any brand will do, but Aunty really likes the freshness and taste of this one.

Here is the link to Hawaiian Electric’s recipe, or follow along with Aunty below.

Ingredients:

2 1/2 cups mochi rice
2 1/2 cups water
6 large dried mushrooms, soaked (start the soaking first or use fresh)
3 slices bacon, chopped
1 cup chopped onions
1/2 cup chopped green onion
1/2 lb diced lup cheong (Chinese sausage)
1 cup chopped water chestnuts
2 tablespoons chopped Chinese parsley
2 teaspoons soy sauce
1 1/2 teaspoons salt
1/2 teaspoon sugar
Dash of pepper

Soak the 6 large dried shiitake mushrooms, following package directions.  The Korean shiitake mushrooms from Costco require soaking it in just boiled water for quite a while.  Do this part early because sometimes those mushrooms seems to take forever to soften, or use fresh ones.

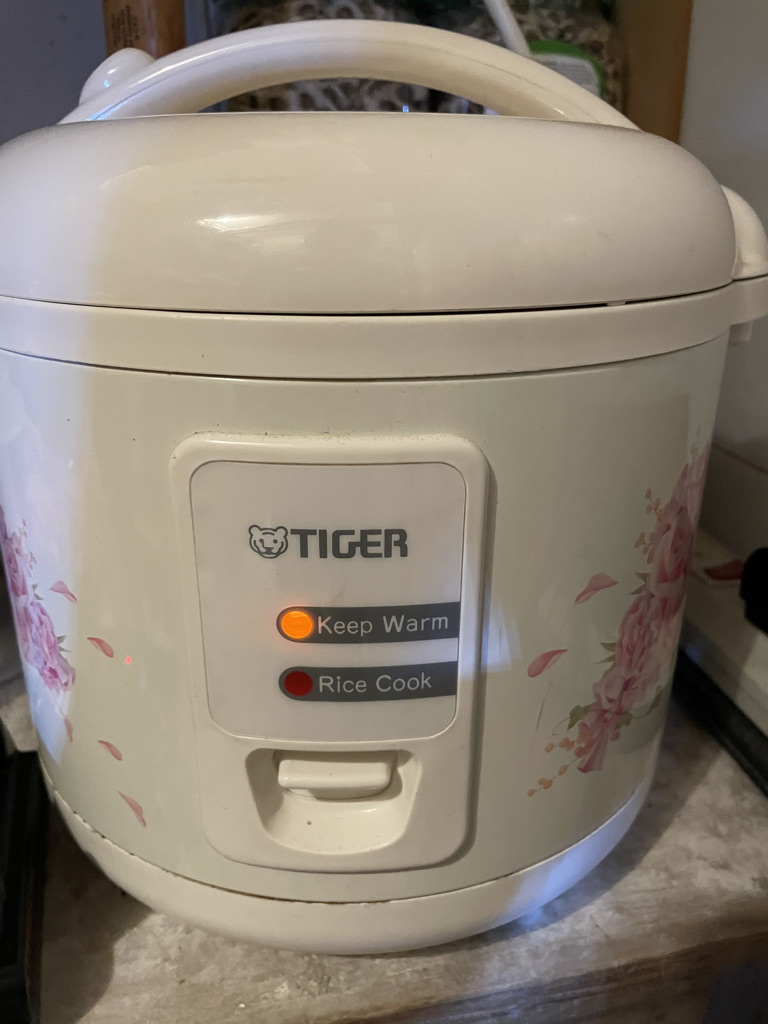
Cook the 2 1/2 cups of mochi (sweet) rice in your rice cooker.  I usually do 5 cups so we have more stuffing.  Sometimes I soak before cooking, but many times I don’t remember to prep the rice so I just cook it like regular.

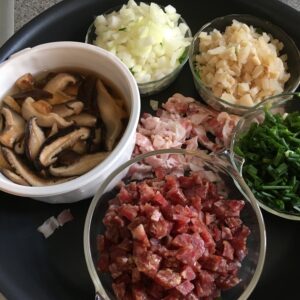
Chop, chop, chop all the ingredients.  This is the junk part but if you prep it all ahead of time, it becomes a pleasure to cook rather than a chore.  Chop the non greasy stuff first, i.e. onions, green onions, mushrooms, water chestnuts, Chinese parsley.  Then chop the lup cheong, then the bacon.  I put the chopped onions, green onions, lup cheong, and mushrooms in a big bowl together, and the water chestnuts and Chinese parsley in a smaller bowl together.  The bacon goes right into the pan.

Using the biggest non stick pan you have and a large wooden paddle, stir fry the bacon until crisp.  Then, stir fry in the big bowl of chopped stuff – onions, green onions, lup cheong, and mushrooms.  Cook until onions are clear.

Add the cooked mochi rice in dollops or chunks and stir fry, breaking up the clumps of rice and then add the water chestnuts, Chinese parsley, soy sauce, salt, sugar, and dash of pepper.

Stir fry until you are happy.  Your arms might be tired from all that stirring, but the aromas and deliciousness are your reward.  Serve and enjoy!

Grilled Cheese Sandwich

It is such a humble food that we used to make simply by toasting up some bread and then slapping in a piece of cheese while hot to melt the cheese. Or, putting buttered bread with a slice of cheese on a skillet and heat and smash until done. It was never my favorite until I had one at an open market in Ballard with my Seattle transplanted daughter. That day, the air was chilly and a vendor was cooking up several grilled cheese sandwiches on a gas cooktop.

It was SO delicious – greasy, gooey, hot and steamy – in the cold air. This was years ago, before the Covid lockdown madness. On a recent visit to see Seattle daughter and her newborn hapa (haole and Asian) son, we didn’t attempt going out and I don’t think that market was even open. But I kept craving a good grilled cheese sandwich again.

And so, I made it myself at home. I did a little googling and began by putting mayonnaise (NOT butter) on both sides of 2 slices bread. I then heated both sides in a skillet until a slight crust formed. A big slice of Swiss cheese (it was on sale at Safeway’s deli counter) was sandwiched between the two slices and left in the skillet on low heat. Google search specifically said to cook it on low instead of blasting it and smashing. The cheese melted slowly and I flipped the sandwich over to continue toasting the other side.

Was it good?

Man-o-man, it was REALLY ono. Not as greasy as the Ballard market, or as steamy (it is too warm in Hawaii for heat steam), but it was gooey and hot and very satisfying with a bowl of my favorite chicken noodle soup (Lipton’s). I was never a soup and sandwich kind of gal, but I may be turning the corner on that one. I added some moringa leaves to the soup that I picked in the garden so it became healthier by a smidgeon.

Just thinking about it makes me want to make another one. Maybe tonight, after I play in the garden today.

Pal Fay sent me this link to Bon Appetit’s version using butter and only putting mayo on the outside of the bread slices. I will try this way too since I am on a grilled cheese sandwich thing and the joy of biting into this gooey crunchy simple cuisine – at least until I run out of my supply of cheese and/or bread.

https://www.bonappetit.com/recipe/best-ever-grilled-cheese

Mochi Leftovers

Just as I start to write about Korean Natural Farming recipes and formulas, I get sidetracked. My son-in-law’s mother (Yoko) is here and she brought sheets of prepared and cut mochi from Seattle because son-in-law loves mochi and she used to put it in everything that had a sauce or soup. Beef stew, curry, natto, sukiyaki, udon, etc.

I also love mochi. But not in natto – bleh! Recently I added it to some Thai green curry that I made because it was too watery. That was pretty good, if I do say so myself!

This mochi is not the pretty colored one that are super soft with delicious fillings of bean paste, strawberries and cream, peanut butter, etc. It is the plain white mochi used in ozoni made with a mochi maker machine. In the old days, it was made by pounding with mallets in a mortar. It is soft, chewy and yummy on the first day, and then it gets tough and hard.

Freshly made plain mochi is usually rolled out in sheets and cut into rectangles or rolled into balls and flattened. Yoko brought over “bricks” of mochi wrapped in several layers of plastic wrap. Each brick was a stack of many flat rectangles which were easy to use. I was in heaven and made New Year’s ozoni and feasted on Yoko’s mochi dishes such as baked mochi that was used like bread to pick up salmon crumbles, mochi in grated radish, mochi in kinako and maple syrup, mochi in miso soup, and mochi fried up like popcorn. I think I gained about 5 pounds.

After the New Year mochi meals were over, I still had some very hard mochi that I kept in the refrigerator. I could have put them in the freezer but every mid morning and mid afternoon, they (the mochi) called to me, “Eat me, eat me!” And so I did.

I put a thin coating of butter on the front and back of each mochi and fried it in a nonstick pan until a slight crust formed on each side and the mochi became soft and slightly puffy. I then put in on a dish and pour just a little soy sauce on it. OMG. So delicious. Chewy, sticky, sweet and buttery with the saltiness of soy sauce. It goes so well with a cup of hot tea.

Each day I eat these I think I gain another pound. But it is worth it. And I will soon run out of mochi. Or maybe not because Yoko now has a mochi maker machine here. Sweeet!

Beef Barley Soup ala Jalna

Pal Jalna makes my mouth water and my tastebuds go pitter patter. Her husband, son, nephew, and sister are such good cooks, and so is Jalna. This was one of her latest – Beef Barley soup – which I never had. Neither have my kids. It looked easy and I had everything but the barley (Times and Foodland didn’t have it). I found it at Whole Foods and got my beef shank cut at Foodland – 2 thick slabs with bone.

It seemed strange to cook meat and then add vegetables but NOT potato, but I did it because Jalna did it. Here is her recipe and the video that she watched:

Ingredients for four servings:


1 tablespoon vegetable oil
2 pounds beef shank (2 thick slices), seasoned generously with salt and freshly ground black pepper
1 large onion, diced
4 cloves garlic, chopped fine
2 tablespoons tomato paste
4 cups chicken broth, plus more if needed
2/3 cup diced celery
2/3 cup diced carrots 
1 bay leaf
1/4 teaspoon dried rosemary
1/2 cup pearl or naked barley
salt to taste

Salt and pepper beef shank, brown on both sides in stew pot. Remove from pot. Deglaze pot with diced onion, stirring until translucent, then add chopped garlic. Add 2 tablespoons of tomato paste and stir until brownish. Add 4 – 5 cups of chicken broth, diced celery and carrots, bay leaf, and dried rosemary. Put beef shank back into pot, bring to boil, then down to simmer. Simmer for 3 hours.
Remove beef and bones (should fall apart) and set aside. Add 1/2 cup of barley and simmer until barley is cooked (about 45 minutes). Add beef back in to heat up on low for about 5 minutes.
Now enjoy!


So how was it? Winnahs!!! Really ono! Thanks Jalna!!

How to make Black Garlic

Black Garlic is the latest addition to my daily arsenal. Yasumi Gojo of Healing Seitai gave me a few heads of black garlic and asked me to try them. Her husband made them in an old rice cooker and she was sharing it with her clients. Some of them reported better blood pressure and better health. Pal Ryuko who is in the beginning stages of Parkinson’s says it makes her feel stronger. I think that it is making my grey hair black again!

I began to eat one clove a day in the morning and increased to 3 cloves a day. I do like the taste of garlic and the only difficult part of it is peeling the paper off – but it is easy enough to do.

Yasumi taught me how to make this great health supplement with a rice cooker, and I now make my own black garlic with a lot of extra to share.

The recipe

  • Peel off most of the paper from each head of garlic (actually, this step is not necessary). I use the Christopher Ranch bag of raw garlic from Costco because it is grown in California. I can fit about 18 heads of garlic in the 5 cup rice cooker.
  • Lay down a layer of wooden chopsticks or popsicle sticks on the bottom of the rice pot so the garlic is not resting on metal. Cover the sticks with a paper towel, then pile in the garlic heads. Try to keep the garlic away from the side of the pot so it doesn’t burn. Cover the pile of garlic with another paper towel.
  • Close the lid, plug in the rice cooker, and set it on “warm”. Leave the rice cooker on warm for 10 days. The smell is quite strong during the first few days so I keep it in the garage. Unplug the cooker and remove the bulbs when cool enough to handle.

And that’s it! I store the blackened bulbs in a bowl on my kitchen counter and peel and eat 3 cloves every morning. When my supply starts to get small, I start a new batch in the rice cooker. Actually, I am constantly making batches of black garlic because I like to share with others who are interested and may have some issues that it could help, just as Yasumi Gojo shared with me.

Costco also sells black garlic. I like the bottle it comes in, and each bulb has only one round clove in it! However, it is rather pricey and it is also from China. Pal Wandaful said she looked up “black garlic from China” and didn’t like how sketchy their practices are with bleach and questionable fertilizers.

I think that I am having more benefits from taking black garlic than my hair getting darker, but I can’t say for sure. It is a natural remedy that has and entourage effect. I just learned about that while researching the benefits of CBD and cannabis. It is the effect on one’s body that doesn’t just treat one thing. It treats everything.

And for that, I am more than willing to have garlic breath in the morning until I brush my teeth. And since we still wear face masks, nobody really notices anyway.

Ono for pumpkin pie

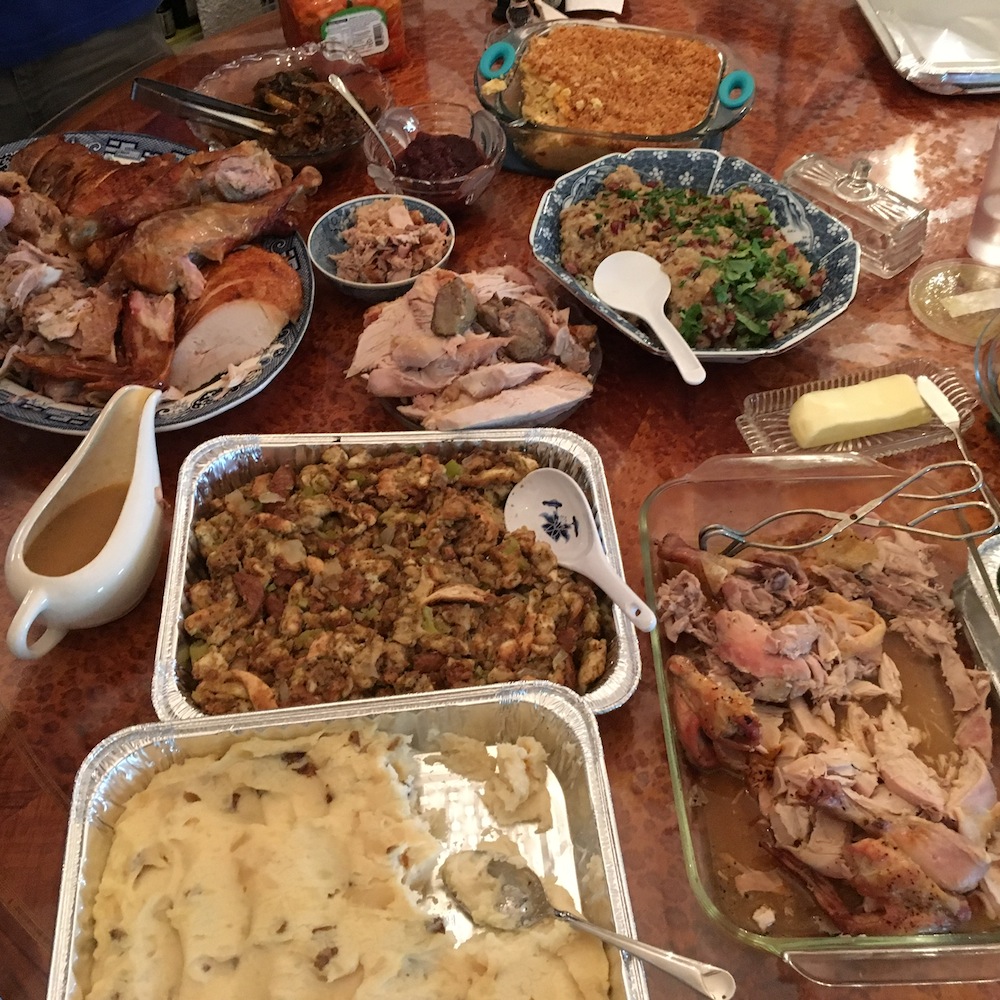
For Thanksgiving this year, we had the usual feast with a very small group of family – which meant there were a LOT of leftovers. Except for pumpkin pie. Lanakila Kitchen’s annual turkey fundraiser included a perfectly cooked 22 lb turkey with homemade stuffing, gravy, corn on the cob, sweetbread rolls, and seasoned roast potatoes, and one little 8″ pumpkin pie. Hardly enough pie to feed the family and nothing left to give away.

This made pie become an almost obsession for Aunty. I really wanted to have a big piece of pumpkin pie – and pal Kay’s picture of Art’s pumpkin pie started a quest to bake one of my own.

I started with my mother’s pie crust recipe. She used to make the BEST lemon chiffon pie from scratch, mixing the chiffon part into the lemon pudding for a wonderful light texture.  Her crust was divine.  MmmmMmmmMmmm.

She would refrigerate the knives and bowl – to ensure the crust is flakey.

Grannie’s Pie Crust (makes 2 very small or 1 large pie crust)
2 cups sifted flour
3/4 tsp salt
2/3 cup shortening
4-6 TBS cold water

Put sifted flour and salt in a large mixing bowl.  Cut in the shortening with 2 cold steel butter knives until sort of mixed.  Add cold water, a tablespoon at a time and mix with spatula until dough forms. Roll into 2 balls. Flatten out with rolling pin. Drape over pie crust, trim, and form ridges along edge. Bake in a 450° oven for 15 minutes.  Cool.  I used just one dough ball and refrigerated the other for another pie another day.

The pumpkin puree can called for cans of evaporated milk – which I did not have.  But, because daughter #2 loves to put sweet condensed milk in her drinks, I did have cans of that, so found an easy recipe from Baking Bites.  I made some changes with the spices and also in how I cooked it at a consistent lower temperature for a longer time (because it was easier).

Sweetened Condensed Milk Pumpkin Pie
(or Four Ingredient Pumpkin Pie)

1 15-oz can pumpkin puree (approx 1 3/4 cups)
1 14-oz can sweetened condensed milk
2 large eggs, room temperature
2 tsp pumpkin spice ( I used 1/2 tsp each of ground cinnamon, nutmeg, and ginger)
2 tsp vanilla extract (optional)

1 tsp worchestershire sauce (update on 2nd pie)

Preheat oven to 325F.
In a large bowl, whisk together pumpkin puree, sweetened condensed milk, eggs and pumpkin pie spice. Add in vanilla, if using. Pour into cooled crust.
Bake for 60-70 minutes, or until the pie filling is set and jiggles only slightly when the pan is jiggled.

My first pumpkin pie

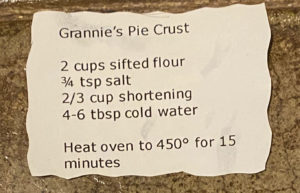
How was it?  Not sure.  The crust was really flakey, which I like a lot.  The pumpkin filling was “meh” because I baked it for 60 minutes and by the time I checked on it, it didn’t jiggle at all.  Overcooked it.  This recipe was double enough for an 8″ aluminum pie pan so I will bake another one soon and keep the cooking time down.

Still, I would consider it a success because it is edible and tastes like a pumpkin pie.  And maybe it was easy, for a person who doesn’t really cook.

Update three days later

I backed another pie with the other half of the crust dough (me thinks I need to find a marble slab for rolling ease) and I added worchestershire sauce to the pie filling, just to try a zapper.  I also didn’t bake it for an hour – just 45 minutes in the oven – and it still was past jiggling.

However, I think it was a success!!!  Aunty can bake pies!

A new life for old kim chee

Aunty likes the Korean kim chee from Costco – it used to be Choonga and now it is called Joonga.  The big squarish bottle with the green plastic cover.  SO ono but TOO much.   I eat it with rice or saimin, or sometimes I would make it with spam – Ann Corum’s recipe.  But I can’t finish most of the bottle so it starts to get old and more potent and sits in the refrigerator until I guiltily throw it away after a few weeks.  So wasteful.

Jalna did a post about putting it in hamburger.  It looked really good and I still have to try it.

Recently I was watching a new Korean drama on Netflix called Mystic Pop Up Bar.  It is a cute show about a punished shaman’s daughter who has to save 100,000 people because of what she did 300 years ago.  Anywho, one of the characters shared a recipe with her using old kim chee.  It goes like this:

Rinse ripened kim chee.  (I also squeezed it out so it was like a big golf ball).  Chop it up finely and add shoyu and sesame oil.  Plop it on noodles and pour anchovy sauce over the bowl.

Sounds good and easy, doesn’t it?  So I made it tonight, but I didn’t have anchovy sauce.  (What is that anyway?)

It was karai, sour, and sweetish.  Strange but very delicious!  Perfect for a hot bowl of noodles.  And good for my digestion because kim chee is full of probiotics.  So glad to find another good kim chee recipe, especially for old kim chee.  No more waste, woo hoo!


MW’s Shoyu Chicken that is more like Nishime – winnah!

Aunty doesn’t cook BUT Hawaiian Airlines has some neat local articles and one of them was chef Wade Ueoka sharing a recipe.  I used to get take out orders from him at the Farmer’s Market way before he and his wife opened the popular MW Restaurant.  That restaurant has unreal fancy food and desserts to die for.  However, truth to tell, I liked the homestyle cooking from his humble tent better because I like simple and cheap.

The Hawaiian Airline’s site has other local recipes and even videos.  I liked this recipe because the ingredients are what I have in the refrigerator.  Chicken, carrots, daikon, onions, ginger.  But it is not what I expected when the title said “shoyu chicken”.  I figured shoyu chicken is easy – chicken, ginger, shoyu and sugar – so I checked it out, watched the video, thought to myself, that looks like easy Nishime, and tried it tonight.

And you know what?  It was good – tasted healthy, light – and was easy!  I like how he cut the carrots.  I like how he shows us how he puts the chicken in and the other stuff and then takes the chicken out to chop.  I added shiitake mushrooms because I like shiitake mushrooms.  I also added tsukoshi (little bit) hondashi.

A really good cooking lesson.  I know he doesn’t know me, but I want to shout out, “Tanks, eh!” to chef Wade and Hawaiian Airlines.  He made a cook out of me!

Jalna’s nephew Colin’s Pork Chops

Pal Jalna has a great blog with travel journals, recipes, and photos that have so much joy that Aunty is a Jalna fan.

Recently, she posted about her 9 year old nephew Colin’s Vietnamese Garlic Pork Chop.  It was so cute – his handwritten recipe, and looked so ono, Aunty had to try it because it looked easy.

It was harder than it looked and Aunty was missing several ingredients such as chicken powder, shallots, and fresh garlic, so Aunty made do with mushroom powder (Umami from Trader Joes), stalks of green onion, and some old chopped garlic in a bottle in the back of the refrigerator.

Harvesting and using lemon grass was treacherous.  That plant is killer because of super fine, super sharp little needle hairs that plunge into the skin, even through surgical gloves.  Ouch ouch ouch!  To remove those dang prickles after the laborious process of peeling off the hairy leaves from the stalk and chopping into bits, Aunty slathered Elmer’s white glue on arms, hands, wrists, and wherever else came in contact with the plant from hell.  After the glue dried, Aunty peeled it off in sheets and pieces.  Note to Aunty – freeze the dang lemon grass next time or use something else.

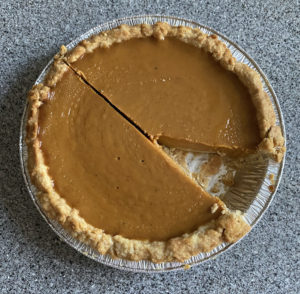
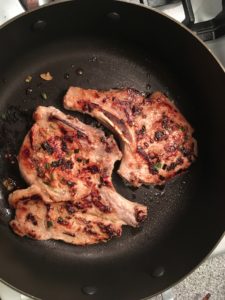
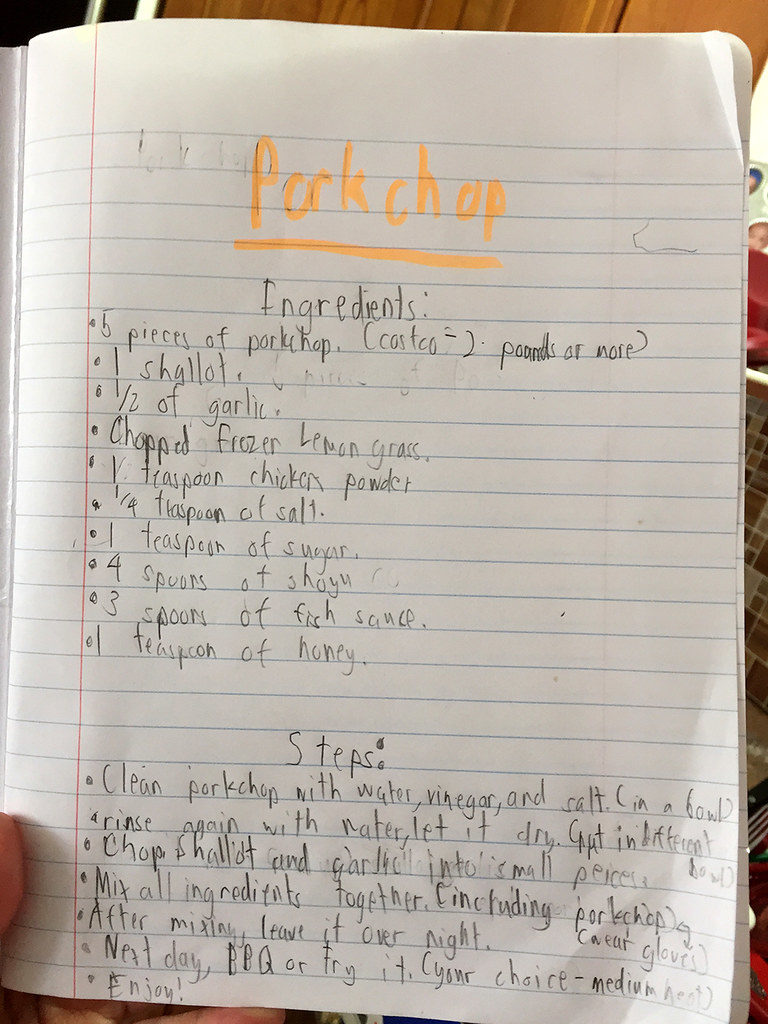
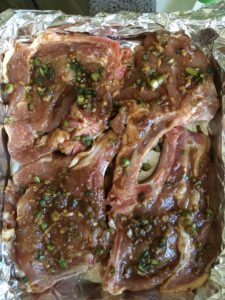
Times Super Market had pork chops on sale for $2.59/lb so for $5.30, Aunty had 4 nice pieces to work with.  It was super wonderful to clean the pork chops first with water, vinegar and salt in a large bowl, and then rinse and pat dry.  That winner first step made the pork seem almost kosher and less stinky.  Great tip, thanks to Colin!

Putting all the other ingredients together after the battle with lemon grass was easy except the Umami powder  (as replacement for chicken powder) was so fine and dusty, Aunty had a coughing fit after shaking out a teaspoon of it.  Actually, what IS chicken powder?

Aunty kind of coated each chop with the sauce, laid them flat in a single layer, covered them with plastic wrap and put it in the refrigerator for several hours.  It was easy to fry them with a bit of oil on medium heat (not too hot or it gets black) and, after plating it, put whatever sauce left in the pan over the pork chops.

It was SO soft, moist, and delicious!  Not sure what did it, but it was!  Thank you Jalna, thank you Colin!  It was a great and successful learning experience.

Here is Colin’s recipe and his broiled version:

Caprese Salad

Aunty’s version before the olive oil, salt, and pepper.

If you one local like Aunty, you say “Capreez”.  However, the proper way to say it is like one Italian, “Ca prez eh”, with the emphasis on the 2nd syllable and a rolling “r”.

On Saturday’s class at the Hawaii Potters Guild, pal Becca (from the East Coast) corrected Aunty’s pronunciation and Aunty told her that we say “capreez”.  She couldn’t believe that, so Aunty asked a group that was gathered nearby if they knew what a “ca prez eh salad” was.  One girl nodded gleefully and said she loved it.  Others looked at me like, “huh?”  until I said “capreez salad” and smiles broke out because now they understood.  That was pretty funny.

Anywho, Aunty now makes ca prez eh salads because of how darn easy it is, and how delicious it is!  It also helps that Aunty has basil growing like crazy in the garden.

How easy?  Like 1, 2, 3 after cutting slices of tomato, slices of mozzarella logs or balls and trimming basil leaves.

After the ingredients are cut in their respective piles:

  1.  lay down a slice of tomato
  2. put a slice of mozzarella cheese on it
  3.  put a basil leaf on the cheese.
  4. Repeat 1-3 until done.

Then, sprinkle a little bit of Hawaiian salt and pepper (optional) and drizzle good quality olive oil on the salad.  Many people also like balsamic vinaigrette drizzled.  That’s it!

It looks pretty, is probably healthy, and when you pronounce it properly, you can kiss your fingertips and sound like an Italian chef.

Buon Appetito!